
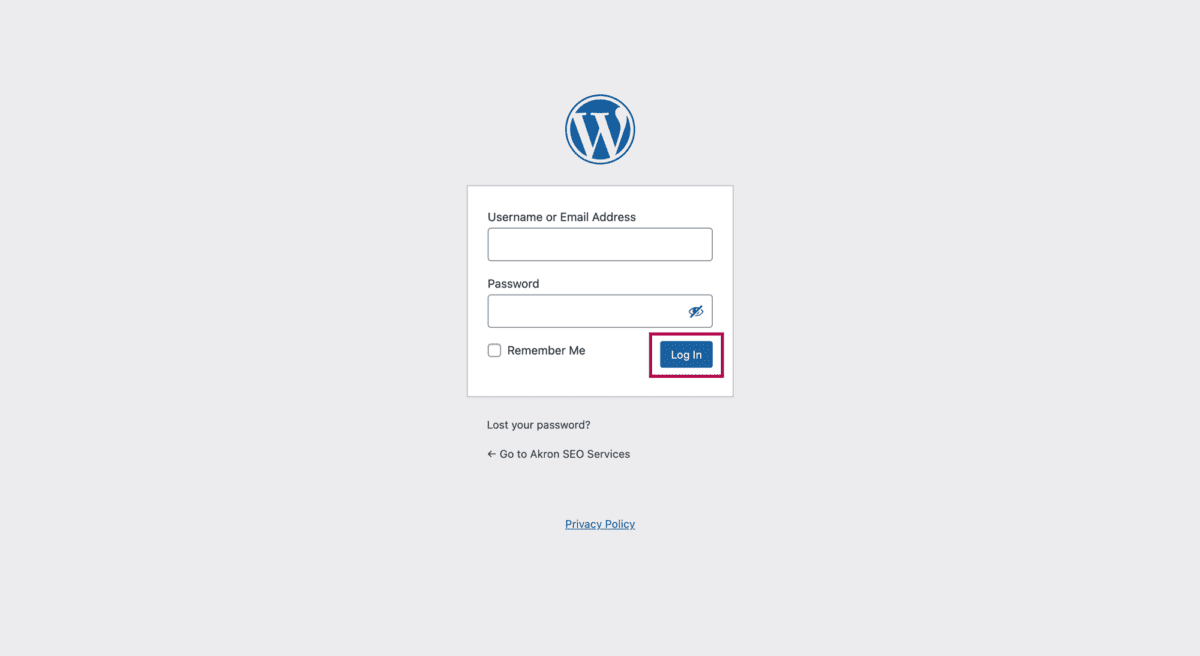
Step 1: Log into your WordPress Admin.
If your site was designed by me, I have provided you with your username and login info. The admin screen is usually found at https://yoursitename.com/wp-admin. Enter your username and password and click Log In.
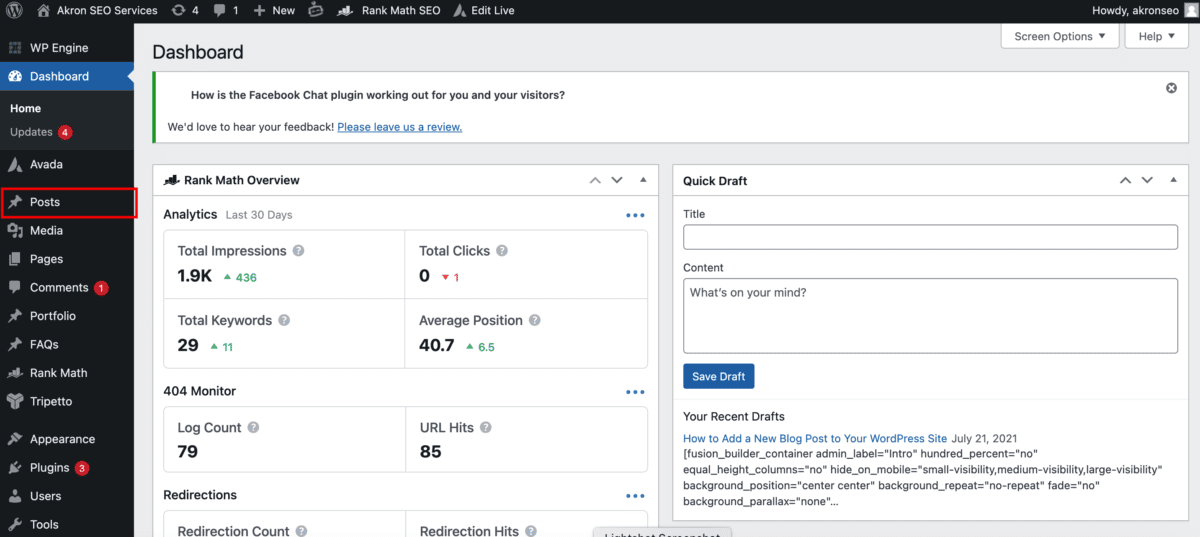
Step 2: On the left menu find the posts section.
You will land on the WordPress Dashboard after logging in. Find the Posts tab on the left, then click it.
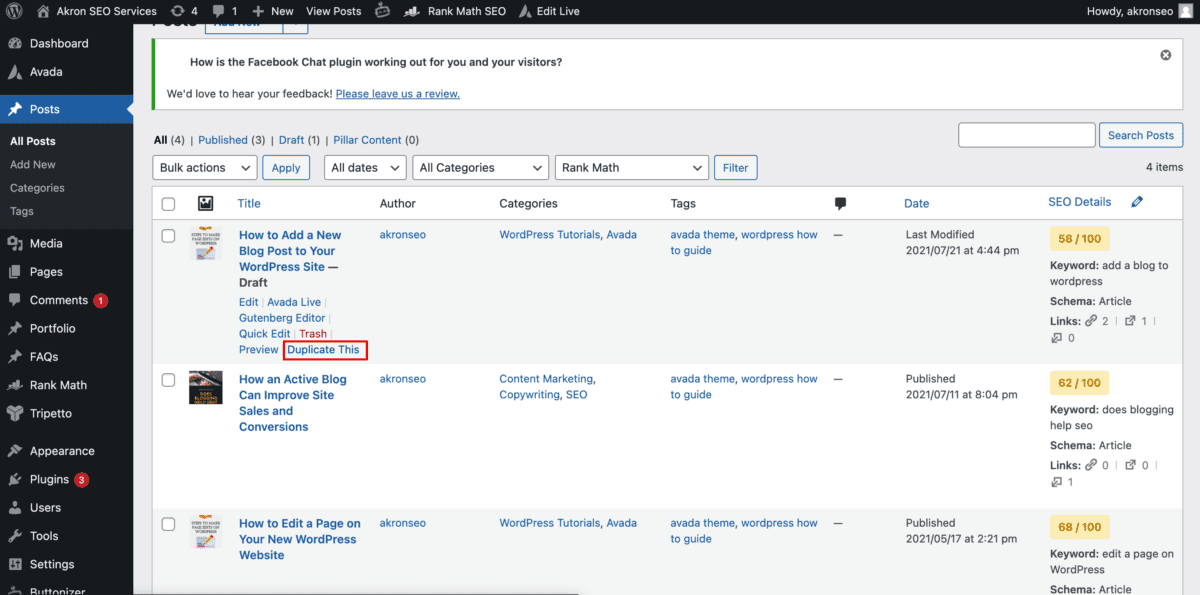
Step 3: Duplicate Previous Post.
When you click posts, you will see a screen that shows all the blog posts on your site. If you hover over the title of the latest blog post, you will see a mini menu appear below it. Here you will click “duplicate” or “clone”.
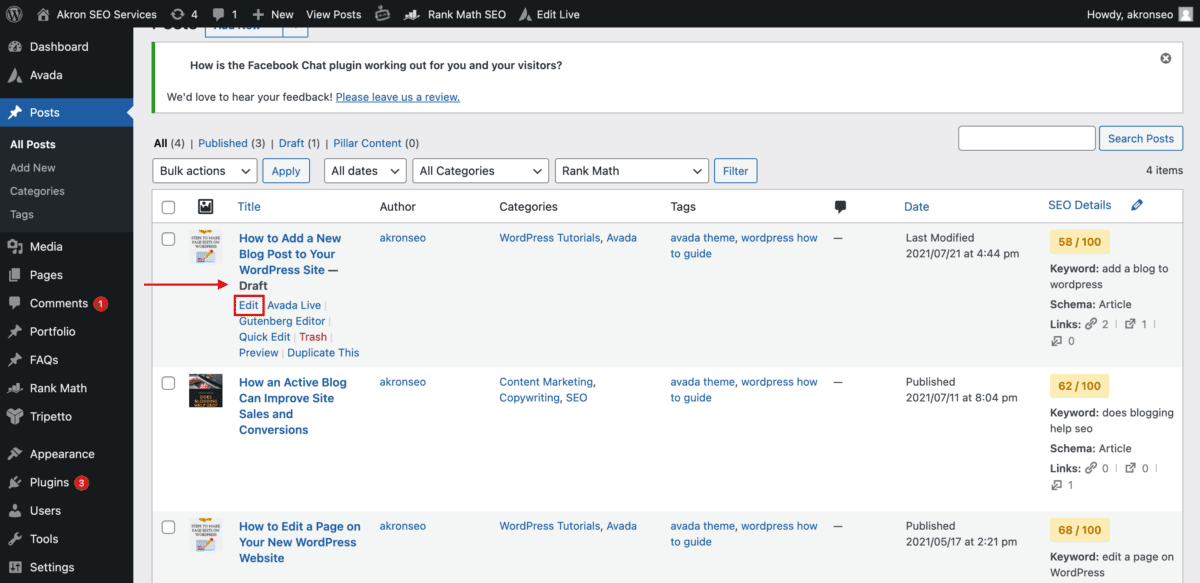
Step 4: Edit New Post.
After duplicating the post, hover over the new draft for the mini menu to appear again. This time you will click “edit”.
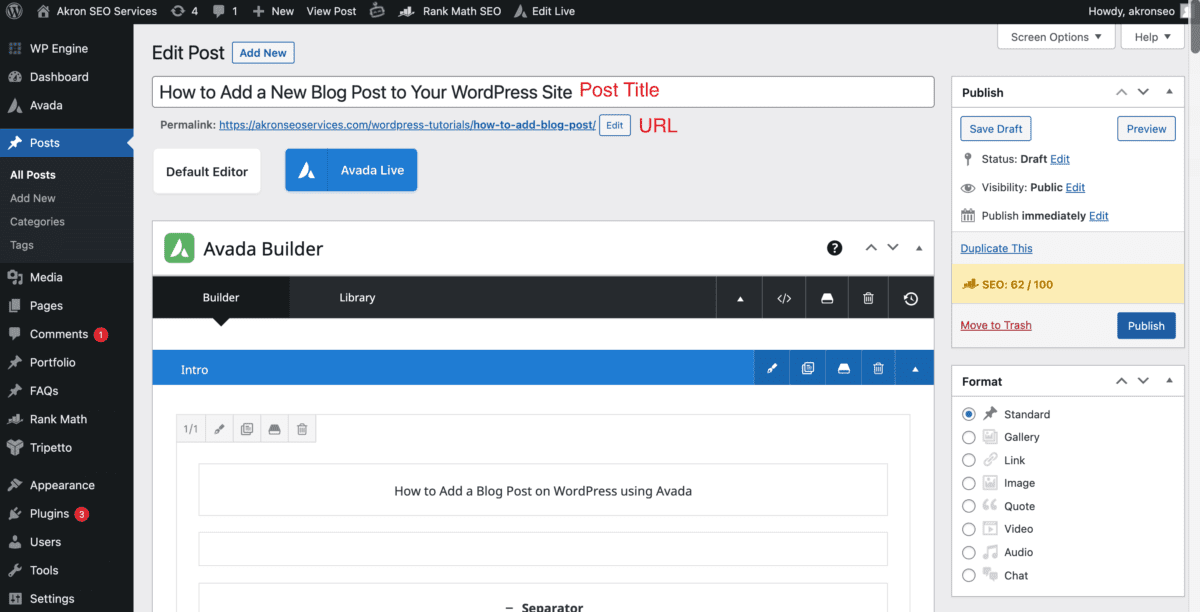
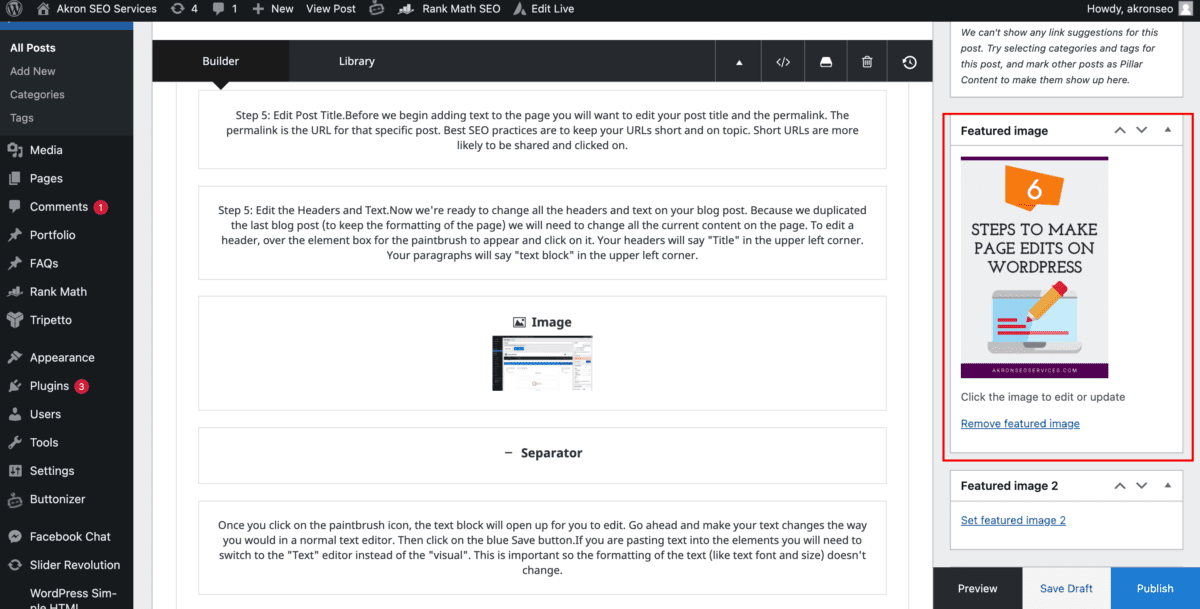
Step 5: Edit Post Title.
Before we begin adding text to the page you will want to edit your post title and the permalink. The permalink is the URL for that specific post. Best SEO practices are to keep your URLs short and on topic. Short URLs are more likely to be shared and clicked on.
Once you click on the paintbrush icon, the text block will open up for you to edit. Go ahead and make your text changes the way you would in a normal text editor. Then click on the blue Save button.

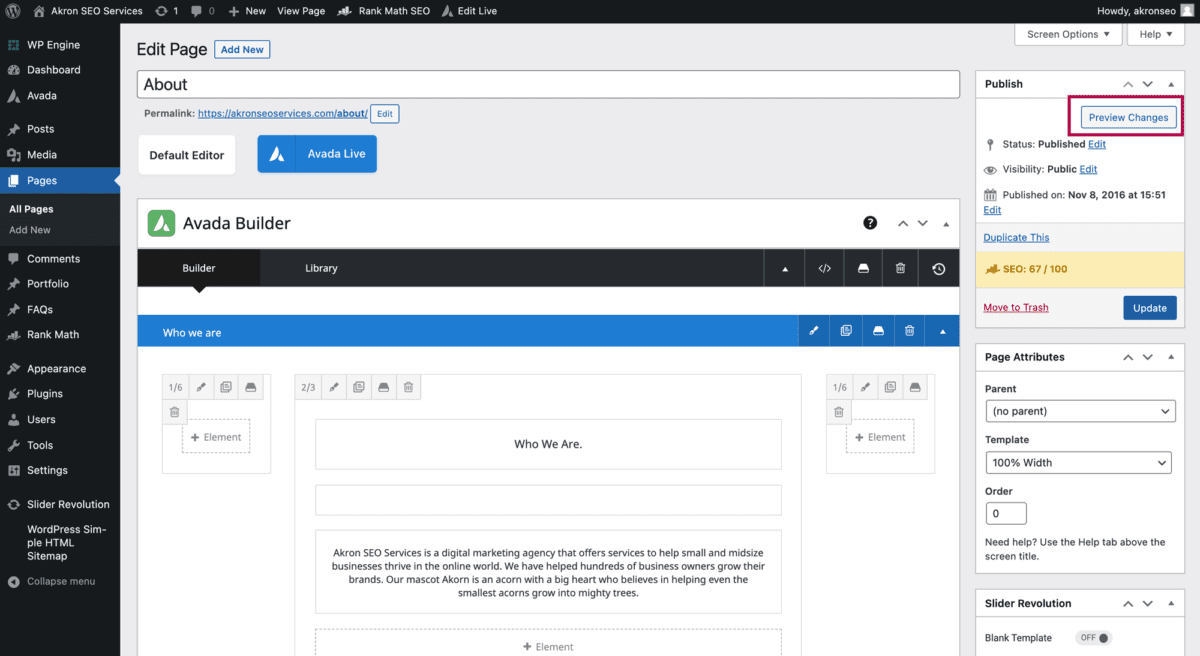
Step 6: Save your changes.
Once you’ve made the changes you want to on your page, you are ready to make them live on your site. Scroll up to the top of the page so you can see the Publish box.
Click on the Preview Changes button to see what your edits will look like on the site before publishing them. A new window will appear showing you what the webpage will look like.
Step 5: Edit the Headers and Text.
Now we’re ready to change all the headers and text on your blog post. Because we duplicated the last blog post (to keep the formatting of the page) we will need to change all the current content on the page.
To edit a header, over the element box for the paintbrush to appear and click on it. Your headers will say “Title” in the upper left corner. Your paragraphs will say “text block” in the upper left corner.
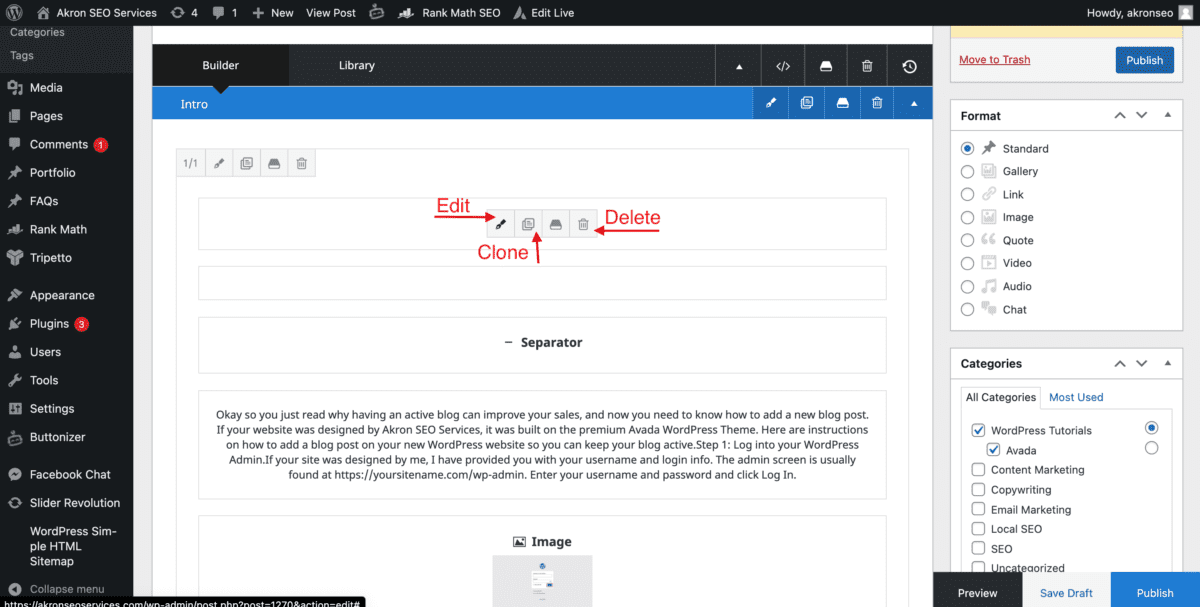
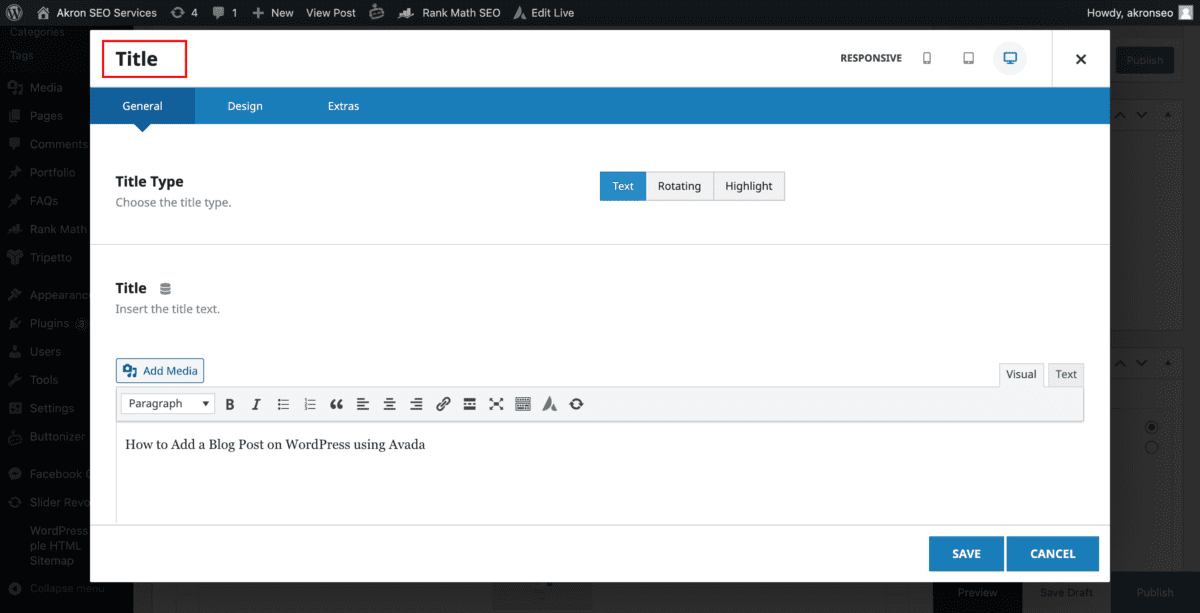
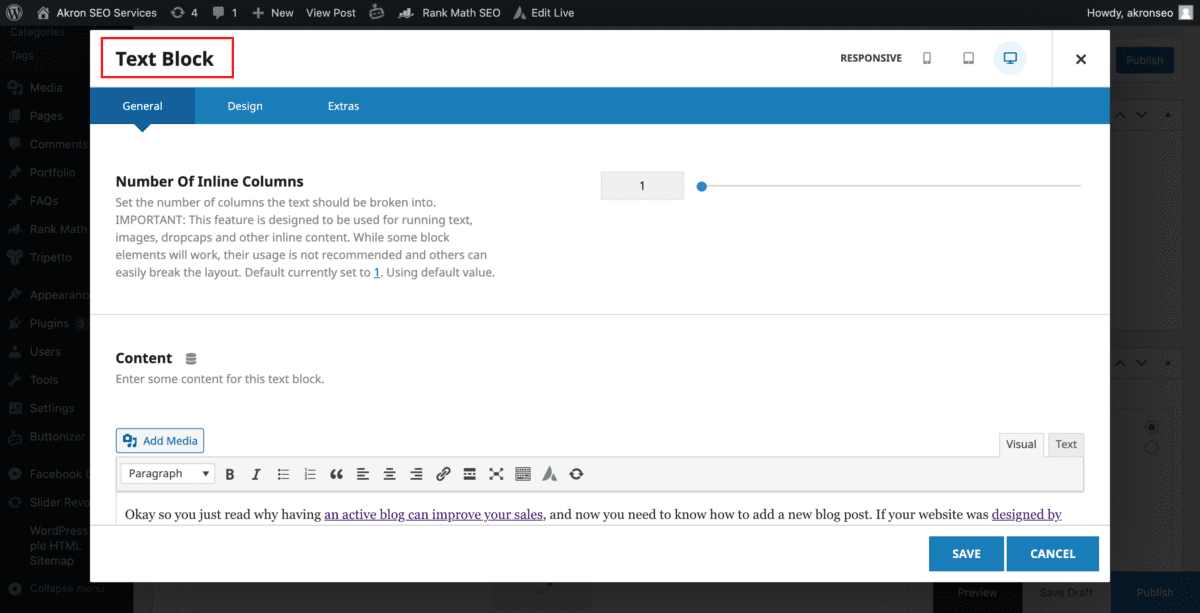
Once you click on the paintbrush icon, the text block will open up for you to edit. Go ahead and make your text changes the way you would in a normal text editor. Then click on the blue Save button.
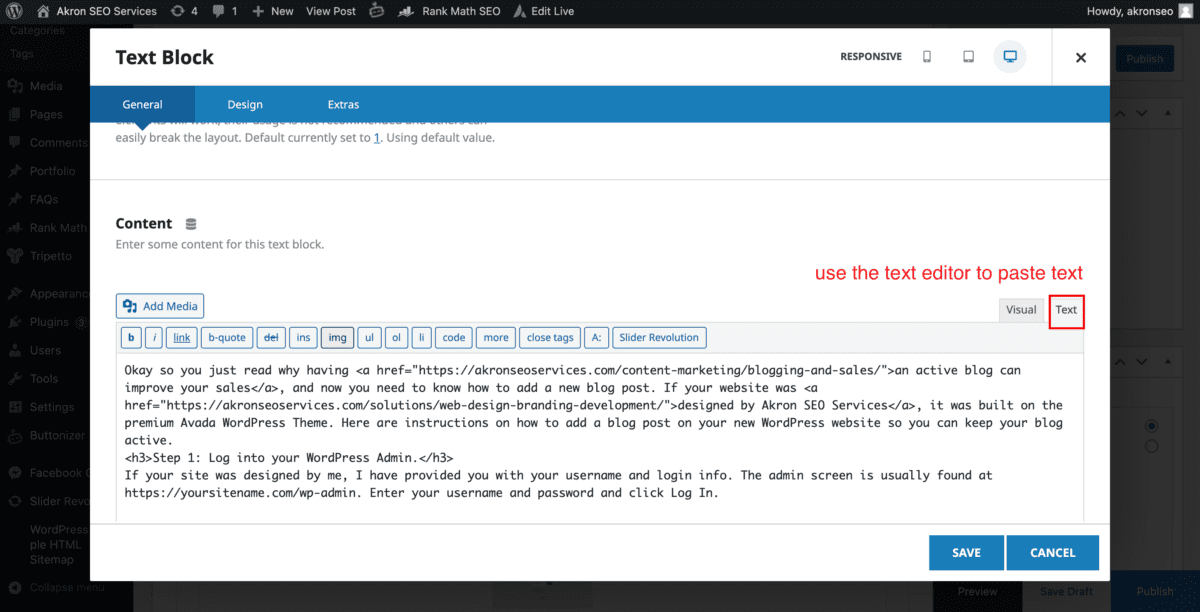
If you are pasting text into the elements you will need to switch to the “Text” editor instead of the “visual”. This is important so the formatting of the text (like text font and size) doesn’t change.
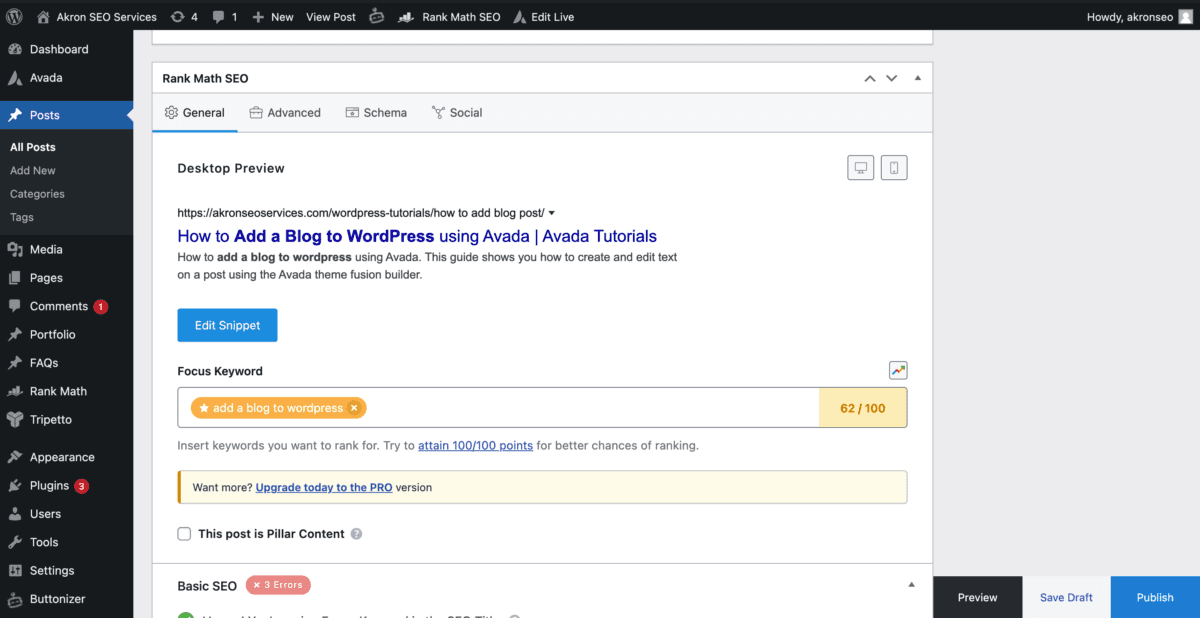
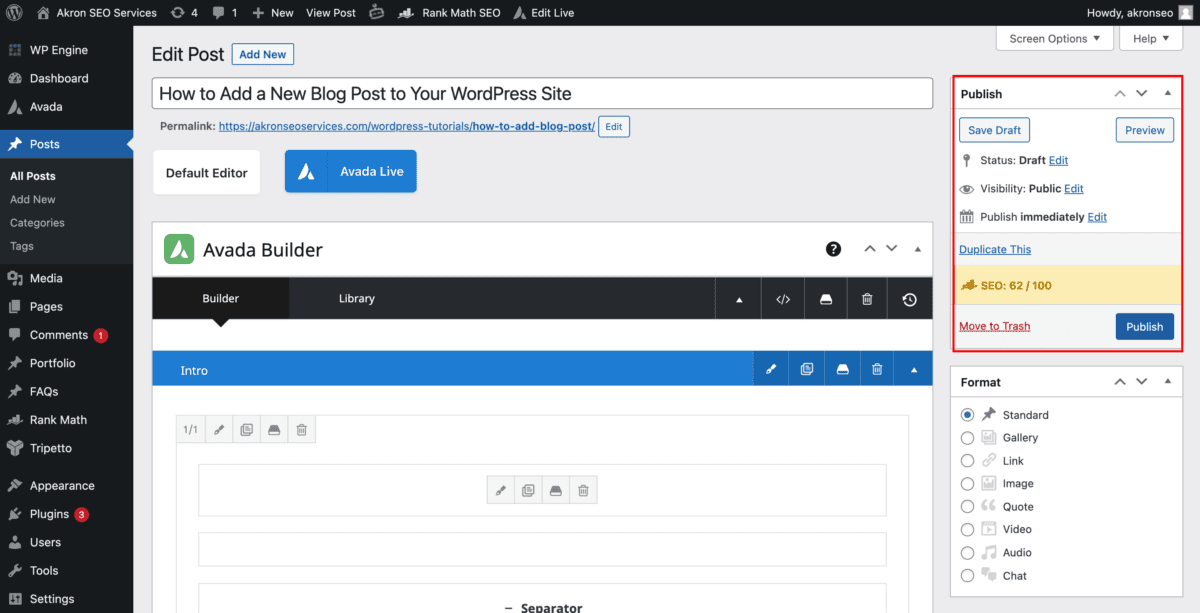
Step 6: Rank Math.
Once your blog post is all written and ready, we will need to review the Rank Math section. Rank Math helps you make sure you’ve optimized your content for SEO. The snippet section is what users will see in Google searches. It is important to have a unique meta title and meta description for every page. Follow the errors section to improve your rank math score.
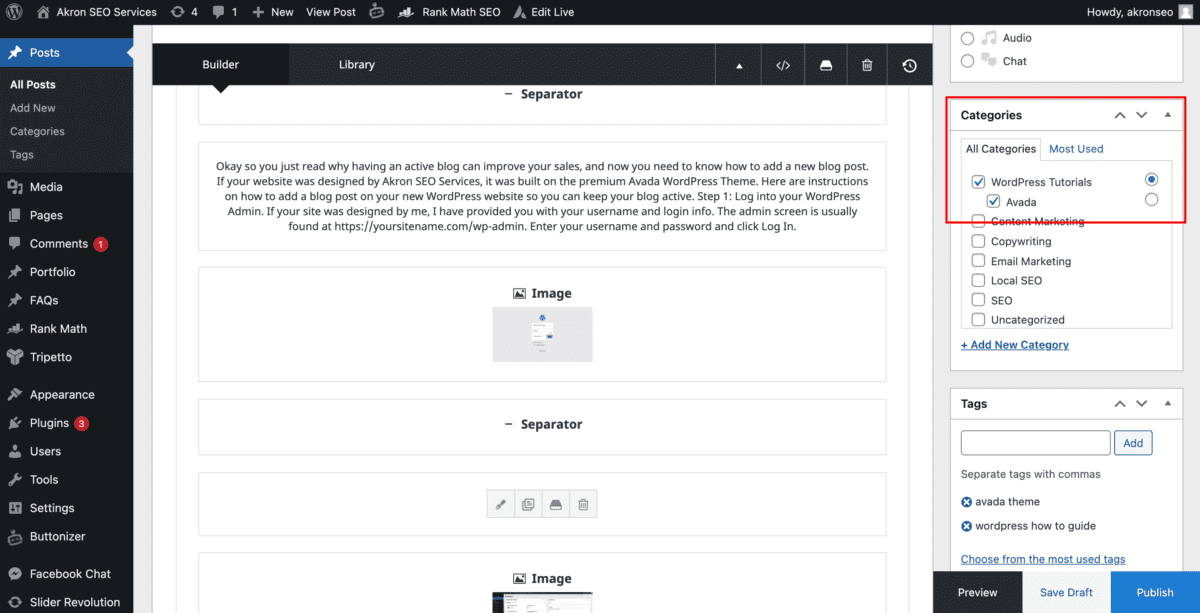
Step 7: Categories.
To help keep your site structure clean and improve your SEO, you’ll want to ensure you assign your post to a relevant category.
Step 8: Set Featured Image.
Below the categories, you will want to set your featured image. This is the image that is shown on your blog page and when the blog is shared. If you need help finding image you can use for this, you can use canva.com and their “blog post” template.
Step 9: Publish.
You are now ready to publish your post. You can either publish now or set a scheduled publish date and time.
That’s it! You’ve added a new blog post on your website using our how to add a blog on WordPress tutorial. Need help editing a page? Find that “how to” guide here.
Related Articles
WordPress
Congratulations! Your website has launched! If your website was designed on Avada WordPress Theme, here are instructions on how to edit a WordPress page so you can edit text on your site.